Choosing the right Heat Exchanger is rarely a simple equipment purchase. It is a process decision involving temperature, flow rate, pressure, fouling, materials, maintenance, and operating risk. A unit that looks efficient on paper may become expensive when its tubes clog or its pressure drop rises. Small details matter. A narrow passage can improve heat transfer, yet increase pumping costs and cleaning difficulty.
Dr. Ramesh K. Shah, a respected heat-transfer specialist and author, wrote, “The design of a heat exchanger involves a number of compromises.” That principle remains practical today. Engineers must compare thermal performance with footprint, corrosion resistance, inspection access, energy use, and long-term reliability. The seven tips in this guide examine those decisions closely. They cover process requirements, exchanger types, material selection, fouling control, pressure drop, lifecycle cost, and supplier support. Numbers help, but assumptions can mislead.
Real equipment is not perfectly clean.
A reliable selection begins with accurate operating data. Record inlet and outlet temperatures, mass flow rates, fluid properties, allowable pressure loss, and seasonal changes. Consider what happens during startup, shutdown, and partial load operation. A design based only on ideal conditions may fail during the first difficult season. That is an uncomfortable possibility, but it deserves attention. Engineers should also question whether the cheapest quote includes testing, spare parts, cleaning tools, and technical service. The right Heat Exchanger should deliver stable performance, safe operation, and manageable maintenance over many years. There is no universal best model. The strongest choice is the one that fits the actual process.
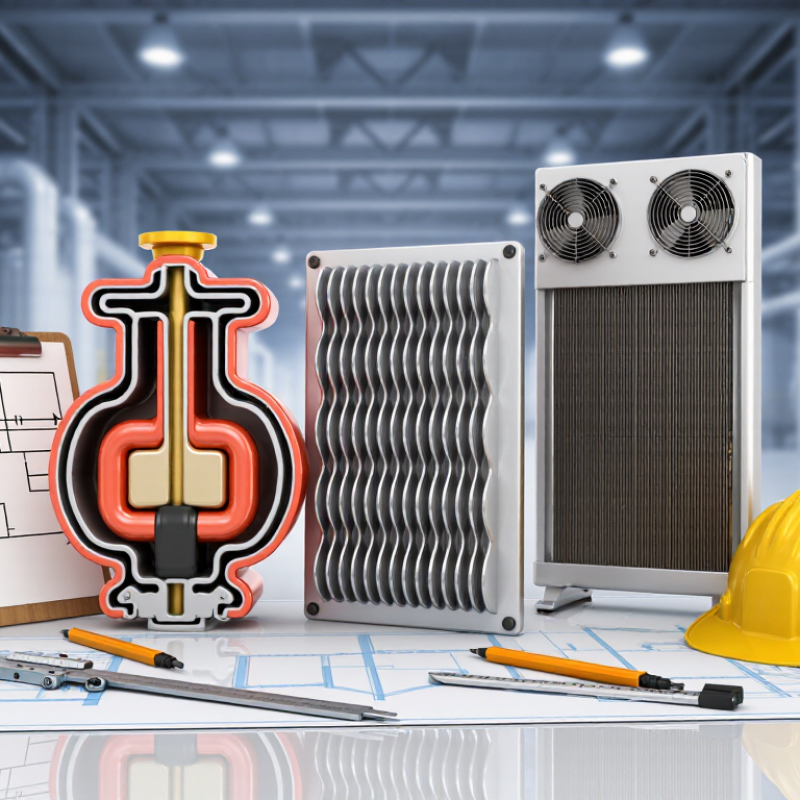
Choosing the right heat exchanger starts with understanding its basic job: transferring heat between fluids without mixing them. Define the heat duty, flow rates, inlet temperatures, outlet targets, and allowable pressure drop. Small data errors can create serious sizing problems. Verify measurements.
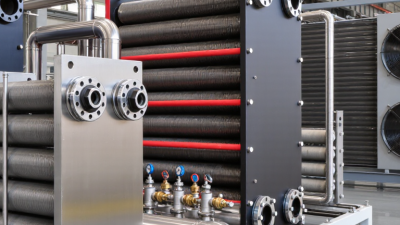
A shell-and-tube exchanger suits high pressure, high temperature, and demanding industrial service. Its tubes are easy to inspect, but cleaning can require significant labor. A plate heat exchanger offers compact design and strong heat transfer through thin plates. It works well with clean fluids, although narrow passages may clog. A double-pipe exchanger is simple and practical for smaller duties. Air-cooled units remove heat with fans instead of cooling water, making them useful where water is limited.
Material selection deserves equal attention. Check corrosion risk, fluid compatibility, temperature limits, pressure ratings, and gasket performance. Review fouling tendencies before choosing a compact design. Leave enough access for cleaning and inspection. Ask whether spare parts and maintenance skills are locally available. That practical question is often missed.
Use thermal calculations, recognized engineering standards, and supplier data together. Do not trust a rating sheet without checking its assumptions. Compare at least two suitable types, then consider lifecycle cost rather than purchase price alone. No selection method is perfect. Real operating conditions may change, so include reasonable margins without oversizing blindly.
Choosing the right heat exchanger begins with defining the actual heating and cooling duty. Record the process fluid, flow rate, inlet temperature, outlet target, operating pressure, and expected temperature changes. A laboratory target may not match a production shift. Check both peak demand and normal demand. Small gaps here can cause costly oversizing.
Tips: 1. Measure real flow rates. 2. Allow for seasonal temperatures. 3. Identify fluid chemistry. 4. Check pressure limits. 5. Estimate fouling risk. 6. Review cleaning access. 7. Confirm future capacity. Keep these notes together. They become useful during technical reviews.
In field assessments, I have seen systems perform poorly because cooling-water temperatures were assumed, not measured. Ambient conditions matter, especially for air-cooled equipment. Ask whether the process runs continuously, intermittently, or in short batches. Also examine startup conditions, where temperature differences may be unusually high. A design based only on average values can miss these moments. I would also question uncertain data rather than hide it. That may slow selection, but it improves reliability. Provide conservative ranges when measurements are incomplete, then verify them before final sizing.
7 Tips for Choosing the Right Heat Exchanger
Match Materials to Temperature, Pressure, and Fluid Conditions
Start with the actual operating temperature, not the temperature listed in a sales specification. Material strength can change sharply near the upper design limit. Confirm both normal and upset conditions. Pressure deserves the same attention. Wall thickness, gasket selection, and joint design must withstand pressure surges, not just steady operation.
Fluid chemistry often decides material compatibility. Chloride-rich water may attack stainless steel through pitting. Acidic fluids can damage alloys that appear suitable on paper. Check concentration, velocity, dissolved oxygen, and cleaning chemicals. Do not guess. Obtain a corrosion allowance from qualified engineering data or validated testing.
Thermal conductivity is important, but it is not the only factor. Copper transfers heat efficiently, while titanium can offer stronger resistance in demanding seawater service. Fouling behavior may matter more than conductivity over time. Keep passages accessible for inspection and cleaning. Small channels can deliver excellent performance, yet they may block quickly.
Review galvanic risks when different metals share the circuit. Confirm gasket and seal compatibility at operating temperature. Ask for material certificates and pressure-test records. Independent verification is valuable for critical systems. Field engineers should compare predicted performance with real fluid samples, because laboratory assumptions can be incomplete.
A cautious design may cost more initially. It can prevent repeated shutdowns later. Perfect information is uncommon. Document every assumption, then challenge the weakest one.
Thermal conductivity is only one part of material selection. Match the material to operating temperature, pressure, fluid chemistry, corrosion risk, cleanliness requirements, and fabrication constraints.
Choosing a heat exchanger starts with real operating data, not a catalogue headline. Compare thermal efficiency at your actual inlet temperatures, flow rates, and expected fouling conditions. A unit rated at peak performance may lose efficiency when water quality changes. Ask for test conditions and documented calculations.
Size the exchanger for the required duty, but leave practical space around it. Measure doorways, service clearances, pipe routes, and lifting access before ordering. Pressure drop matters too. Excessive resistance can increase pump energy and reduce system performance. It may look efficient on paper.
Maintenance needs often decide the better choice. Check whether plates, tubes, seals, and inspection covers are easy to reach. Consider cleaning frequency, spare-part availability, and the skills of your maintenance team. I have seen compact units installed in spaces that made simple cleaning surprisingly difficult. Small detail. A costly mistake.
Installation conditions deserve equal attention. Confirm connection orientation, support requirements, drainage, insulation, and protection from vibration. Match construction materials to the fluids, temperatures, and corrosion risks. Review the supplier’s drawings with the installer before fabrication begins. Do not assume existing pipework will fit. Calculate lifecycle cost, including energy, cleaning, downtime, and replacement parts. Finally, compare independent performance data with the supplier’s claims, and record the assumptions behind your selection. Some assumptions will be wrong. That is why commissioning measurements matter.
| Tip | Selection Dimension | What to Compare | Practical Evaluation Data | Why It Matters | Installation and Maintenance Considerations |
|---|---|---|---|---|---|
| 1 | Define the Thermal Duty | Calculate the required heat-transfer duty before comparing equipment: Q = m × Cp × ΔT. Confirm the hot-side and cold-side inlet and outlet temperatures. | Record fluid flow rates, specific heat, density, operating temperatures, design temperature, and required heat load in kW or BTU/h. Also check the required temperature approach between the two fluids. | An undersized exchanger will not achieve the target outlet temperature; an oversized unit increases capital cost and may operate inefficiently at low load. | Provide operating and design conditions, including start-up, shutdown, seasonal, and maximum-load cases. Allow suitable control-valve and sensor locations. |
| 2 | Compare Thermal Efficiency | Compare heat-transfer effectiveness, overall heat-transfer coefficient, temperature approach, and allowable pressure drop rather than relying only on nominal capacity. | Effectiveness is defined as actual heat transfer divided by the maximum possible heat transfer. A smaller temperature approach generally requires more surface area and may increase pressure drop. | Higher effectiveness can reduce energy consumption and utility demand, but usually requires additional surface area, tighter flow control, or a higher pressure-drop allowance. | Confirm that pumps, fans, or compressors can provide the required flow against the exchanger pressure drop. Check both normal and fouled conditions. |
| 3 | Match the Exchanger Type to the Service | Evaluate plate-and-frame, brazed-plate, shell-and-tube, double-pipe, and air-cooled designs according to fluid cleanliness, pressure, temperature, phase change, and required flexibility. | Plate designs are often compact and provide high heat-transfer coefficients. Shell-and-tube designs are widely used for high pressure, high temperature, two-phase duty, and applications requiring robust mechanical construction. | The correct configuration improves thermal performance and reduces the risk of vibration, leakage, fouling, or premature material failure. | Confirm orientation, nozzle arrangement, removable access, support points, insulation requirements, and whether the unit must be installed indoors or outdoors. |
| 4 | Check Size and Available Space | Compare heat-transfer area, overall dimensions, operating weight, service clearance, and connection locations—not only the footprint. | Compact plate exchangers commonly require less floor space than equivalent shell-and-tube units, while shell-and-tube equipment may require more length and clearance for tube-bundle removal. | A smaller footprint can lower structural and building costs, but limited access may make future inspection, cleaning, or replacement difficult. | Reserve clearance for plate-pack opening, tube-bundle extraction, lifting equipment, valve operation, insulation, and drain or vent connections. |
| 5 | Evaluate Fouling and Cleaning Needs | Assess suspended solids, biological growth, oil, dissolved minerals, viscosity, and the expected fouling rate on each fluid side. | Use a suitable fouling-resistance allowance in the thermal design. Higher flow velocity can reduce deposits but also increases pressure drop and pumping cost. | Fouling reduces heat-transfer performance, increases energy use, and can cause corrosion or flow blockage if not controlled. | Removable plate packs allow access for inspection and mechanical or chemical cleaning. Shell-and-tube units may require channel-head access, tube brushing, hydroblasting, or chemical cleaning. |
| 6 | Verify Materials and Operating Limits | Check wetted materials, gasket compatibility, corrosion resistance, maximum allowable working pressure, design temperature, and thermal expansion. | Material selection must consider chloride content, pH, dissolved oxygen, refrigerants, oils, glycol concentration, seawater exposure, and any cleaning chemicals. | Incorrect materials or gasket selection can lead to leakage, stress corrosion, chemical attack, contamination, or shortened service life. | Install pressure-relief protection where required. Provide isolation, drain, vent, bypass, and sampling connections so the exchanger can be safely removed or serviced. |
| 7 | Compare Lifecycle Cost and Future Flexibility | Compare purchase price with energy consumption, water use, cleaning labor, spare parts, downtime, inspection, replacement, and expected operating life. | Consider whether the design can accommodate future capacity increases, seasonal load changes, additional passes, extra plates, parallel units, or a standby exchanger. | The lowest initial price may not provide the lowest total cost when energy, maintenance, downtime, and replacement expenses are included. | Include lifting access, isolation valves, bypass piping, spare seals or gaskets, drain points, monitoring instruments, and a documented cleaning procedure in the project scope. |
A suitable heat exchanger must meet the pressure, temperature, and fluid requirements of the process. Check applicable pressure-vessel rules, workplace safety regulations, and inspection requirements before comparing prices. Ask for material certificates, pressure-test records, and clear maintenance instructions. These documents support reliable decisions and reveal missing details early.
Safety depends on more than a strong shell. Confirm that gaskets, tubes, valves, and relief devices match the operating fluids. Corrosive liquids may require stainless alloys or special coatings. A qualified engineer should review thermal expansion, flow velocity, and emergency shutdown conditions. Small design assumptions can create expensive failures.
Purchase price is only one part of the cost. Include installation, energy use, cleaning, spare parts, downtime, and disposal. A cheaper unit may develop fouling faster and demand frequent shutdowns. That is not always obvious in a quotation. Check expected service life, replacement-part availability, and inspection access. Look for performance data based on realistic operating conditions, not ideal laboratory figures.
Keep records.
Monitor pressure drop and outlet temperature after installation. A gradual change may indicate scaling, leakage, or reduced flow. Scheduled cleaning helps, but cleaning methods can damage surfaces if chosen carelessly. Review results with maintenance staff each season, then adjust the schedule when evidence supports it. Performance estimates are useful, but they are never perfect.